

Is your security system a proactive guardian or just a passive witness to events you'd rather prevent? Many homeowners in the Sacramento area start their journey with high hopes, only to find themselves staring at a tangled mess of wires or a ladder that feels far too unstable. You want a setup that offers total oversight, yet the anxiety of missing a critical blind spot or being hit with hidden installation fees can be paralyzing.
We understand that true peace of mind comes from knowing every corner of your property is under a watchful eye. A professional home security camera installation shouldn't be a guessing game of wired versus wireless reliability. This guide provides a comprehensive, step-by-step checklist to help you prepare your home for a sophisticated surveillance setup. You'll learn how to choose the most effective locations, avoid common DIY pitfalls, and ensure your mobile app works flawlessly. Whether you're in Folsom or Rocklin, we've designed this roadmap to help you move from uncertainty to absolute control over your environment.
Key Takeaways
- Conduct a thorough property audit to verify Wi-Fi signal strength and map out power paths before any hardware is mounted.
- Maximize property oversight by prioritizing entry points and positioning cameras at a height of 8-10 feet for the perfect balance of detail and security.
- Discover how a professional home security camera installation provides a clean, durable setup tailored to Sacramento’s specific building materials like stucco and siding.
- Decide between the high-reliability of wired PoE systems or the rapid deployment of wireless technology based on your home's unique infrastructure.
- Finalize your defense by configuring smart motion alerts and mobile app integration to maintain constant, unobtrusive vigilance from anywhere.
Pre-Installation Audit: Preparing Your Property
Professional home security camera installation begins long before a technician climbs a ladder. It starts with a strategic audit of your property to ensure every device operates at peak performance. Preparation eliminates common delays. It ensures your surveillance network acts as a reliable guardian from the moment it's activated. By taking these steps, you create a foundation for a seamless, high-definition experience that provides absolute control over your environment.
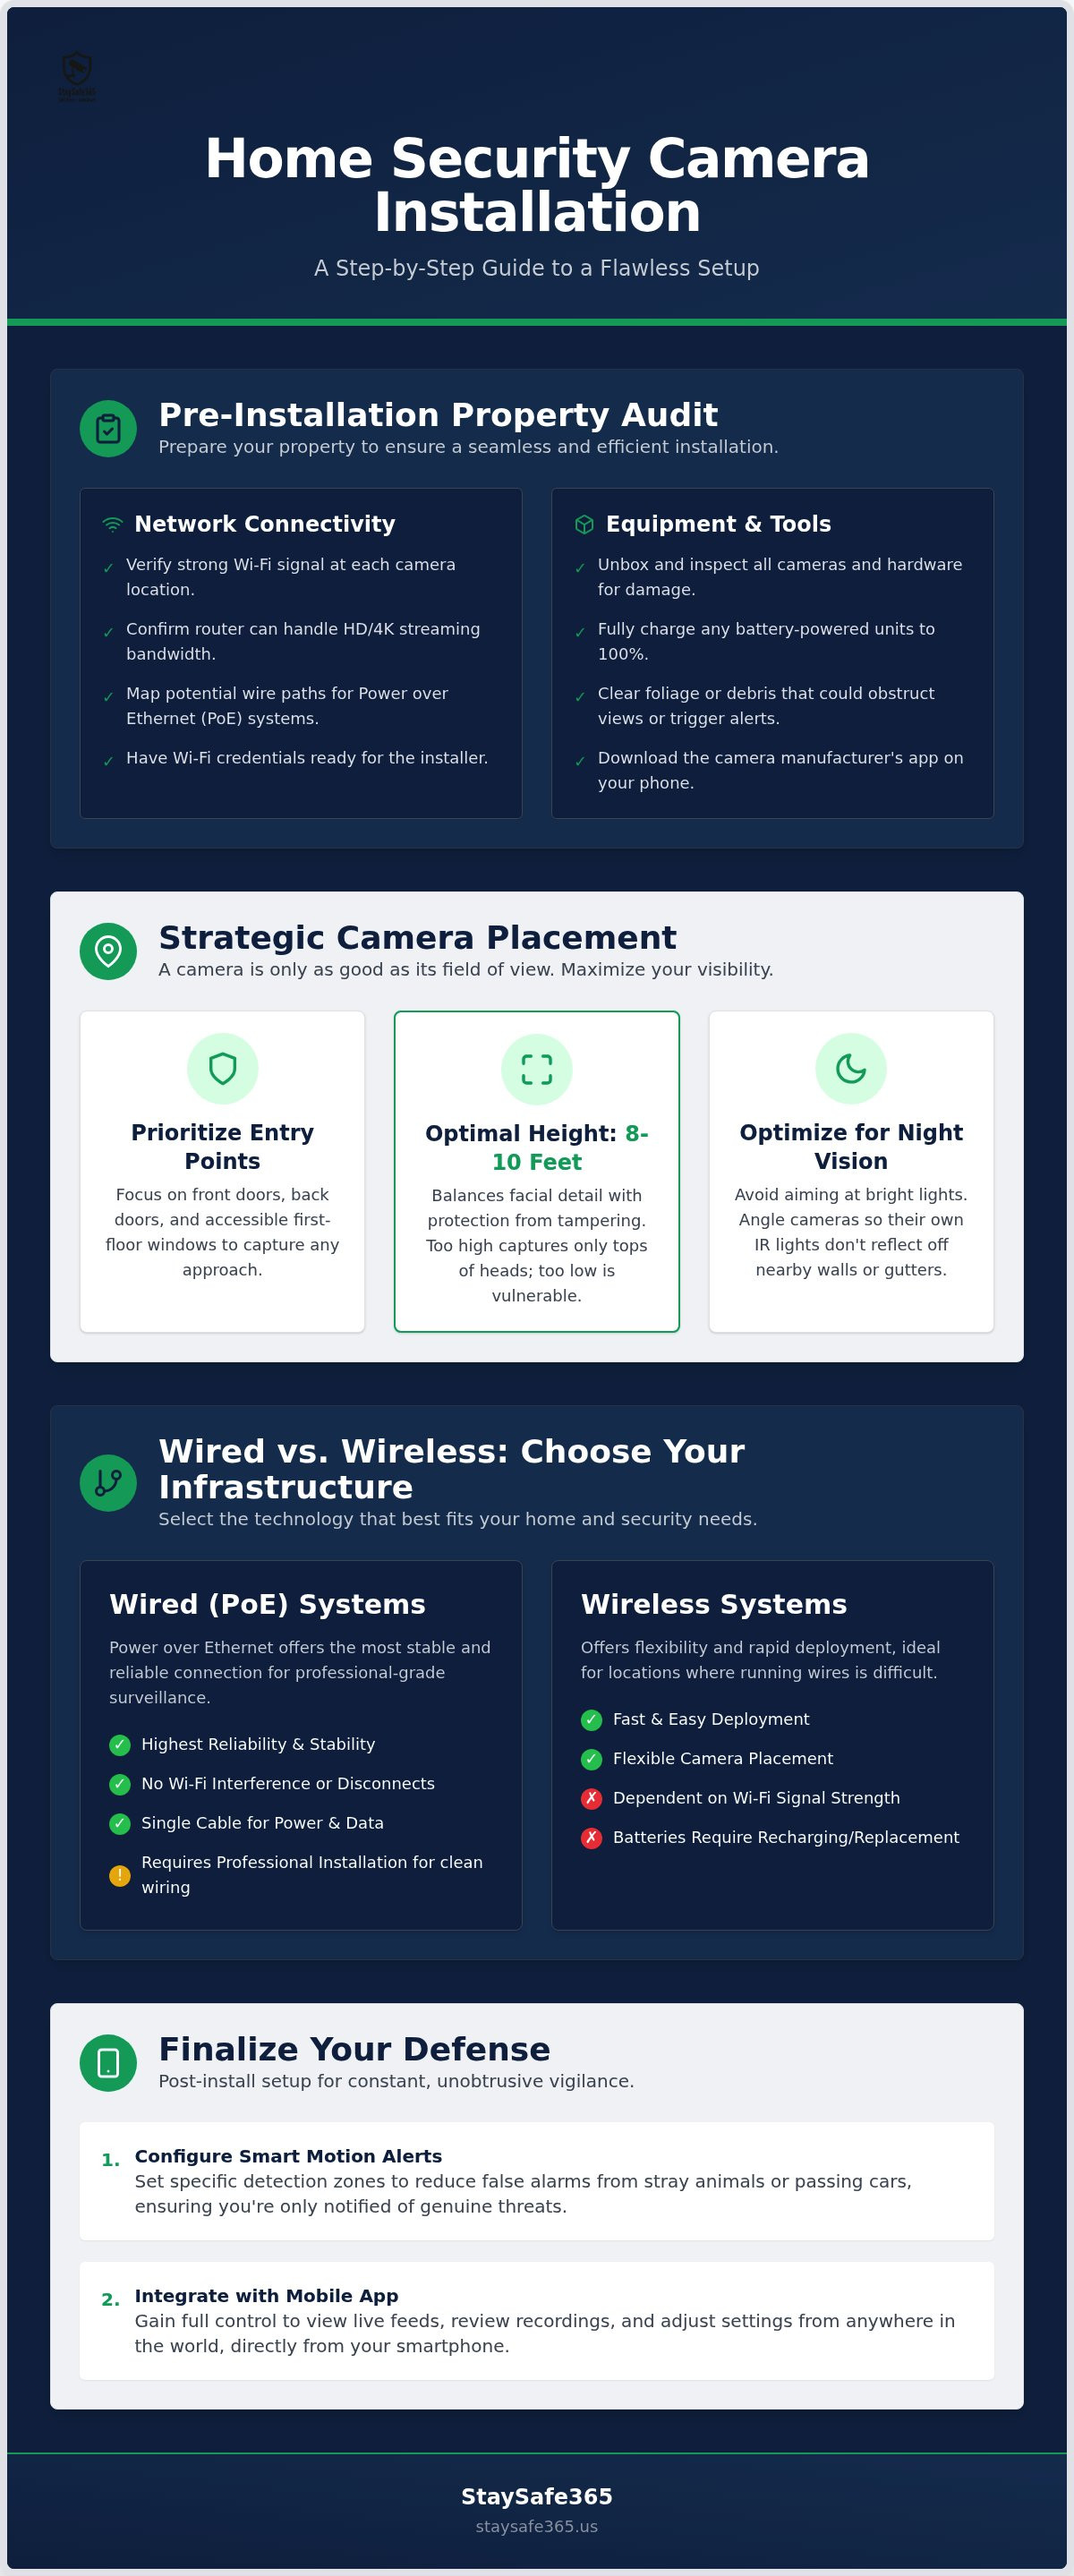
Start by verifying the Wi-Fi signal strength at every planned camera location. Use a speed test app on your phone while standing exactly where the camera will be mounted. If the connection is weak, your high-definition feed will likely stutter or disconnect. For those choosing the "zero-maintenance" reliability of Power over Ethernet (PoE) systems, identify your planned wire paths. Mapping these routes from your router to the exterior walls helps avoid hidden complications during the physical setup. In neighborhoods across Roseville or Elk Grove, where mature landscaping is common, clear away overgrown foliage or debris. A stray branch can trigger constant false motion alerts or obscure a critical field of view during a security event.
Finally, ensure all hardware is ready for the technician. This includes mounts, specialized anchors for Sacramento stucco, and high-capacity SD cards if your system requires local storage. Having these items on hand prevents the frustration of a stalled project. Our transparent, tiered pricing, ranging from $90 for a single camera to $650 for an 8-camera system, relies on this level of preparation to keep your install efficient and professional.
Network Connectivity Checklist
Your router is the brain of your digital defense. Confirm it possesses the bandwidth to handle 4K or HD streaming without slowing down your other devices. If you're covering a detached garage in Folsom or a far corner of a Rocklin lot, a Wi-Fi extender may be necessary. Have your Wi-Fi credentials written down and ready. This allows the installer to move quickly through the smart integration process, connecting your cameras to the cloud without troubleshooting network access issues.
Equipment and Tool Readiness
Unbox and inspect your cameras for shipping damage as soon as they arrive. It's better to catch a hardware defect early than during the heat of the install. If you're using battery-powered units, charge them to 100% so they're ready for immediate testing. You should also download the manufacturer’s app on your primary mobile device. This preparation allows for a smooth "Guardian Handover," where the technician can show you exactly how to manage your new home security camera installation from the palm of your hand.
Strategic Placement: The Maximum Visibility Checklist
A camera is only as good as its field of view. Effective home security camera installation treats your property like a tactical zone, focusing on strategic oversight rather than just mounting hardware. You must prioritize the primary entry points. Most intruders attempt access through the front door, back door, or first-floor windows. Covering these areas ensures you capture high-quality footage of anyone approaching your perimeter, providing the first layer of your digital defense.
Mounting height is a delicate balance. Aim for 8 to 10 feet. If you mount too high, you only see the tops of heads. If you mount too low, the device is vulnerable to tampering or vandalism. This height provides enough detail to identify individuals while keeping the hardware out of reach for a casual intruder. For a deeper dive into lens selection and how different focal lengths affect your view, see our guide on cameras for security at home.
Night vision is essential, but it has specific requirements. Evaluate your lighting conditions before finalizing a spot. Streetlights or bright porch lights can "blind" infrared sensors, resulting in a white-out effect that renders footage useless. Ensure your camera is angled so its own IR lights don't reflect off nearby walls or white gutters. This level of technical foresight is what separates a professional surveillance setup from a standard mounting job. If you're unsure about the optimal angles for your property, a professional home security camera installation consultation can map out your blind spots.
Outdoor Coverage Priorities
Driveways and street-facing access points are your first line of defense. Monitor these areas to log vehicle descriptions and movement patterns. Don't forget the backyard. Side-gate access is a common vulnerability that many homeowners overlook. When angling your cameras, be mindful of neighboring properties in Folsom or Rocklin. Maintaining your own privacy shouldn't mean intruding on theirs. A well-angled camera provides total oversight without creating tension with those living nearby.
Indoor Placement Strategy
Indoors, focus on high-traffic transit areas like the foyer or main hallway. These are choke points that an intruder must pass through to move between rooms. Place cameras near valuable assets or safe rooms to maintain internal oversight during an event. Avoid pointing lenses directly at windows. The sudden shift in sunlight can cause severe glare, making the image unusable during peak daylight hours. By positioning your cameras in the corners of rooms, you maximize the visible area while minimizing the number of devices needed for full coverage.
Infrastructure Choice: Wired vs. Wireless Requirements
Choosing the right infrastructure is a pivotal decision for your home security camera installation. It's the difference between a system that requires monthly attention and one that remains a silent, steadfast guardian for years. While wireless options offer rapid deployment, wired systems provide a level of reliability that smart homes in Sacramento often require for true peace of mind. For technical specifications on complex wiring projects, review our home security camera installers guide. Regardless of your choice, ensure any camera exposed to the elements meets IP65+ weatherproofing standards. Sacramento’s summer heat is intense; inferior plastics can warp, and seals can fail without proper industrial ratings.
Cable concealment is another critical factor for any professional setup. Exposed wires are not just an eyesore; they're a security vulnerability that an intruder could easily exploit. A clean install hides these paths within walls, soffits, or conduits to maintain the aesthetic integrity of your home’s exterior. This proactive approach ensures your surveillance system remains unobtrusive yet fully functional. Our tiered pricing reflects this commitment to quality, offering professional mounting and setup starting at $90 for a single camera and scaling to $650 for an 8-camera system.
The Wired (PoE) Checklist
Wired systems are the gold standard for high-definition oversight. You'll need to ensure access to an attic or crawlspace for discrete wire routing to each mounting point. Identify a central, ventilated location for the Network Video Recorder (NVR) or central hub to prevent overheating. Power over Ethernet provides both data and power through one cable, which significantly reduces the complexity of the installation while providing a stable, high-speed connection that wireless signals cannot match.
The Wireless/Battery Checklist
Wireless cameras offer unmatched flexibility for difficult mounting locations. However, you must check for signal interference from thick stucco walls or large appliances that can cause lag in your live feed. Plan a realistic battery charging schedule to avoid downtime, or consider solar panel attachments for outdoor units to ensure constant power. Finally, verify that your gateway or router is centrally located. A strong signal is the only way to maintain the responsive, mobile app access you need to stay connected to your property from anywhere in the Sacramento region.
The Installation Day: What to Expect from Professionals
Professional home security camera installation is a methodical process that transforms hardware into a vigilant monitoring network. It doesn't start with a drill; it starts with a conversation. When the technician arrives, you'll perform a final "field of view" walk-through together. This step confirms that the strategic placements discussed earlier provide the exact oversight you expect. It's the moment where theory meets reality, ensuring no blind spots remain before the first anchor is set.
Mounting requires specialized knowledge of local architecture. Sacramento homes frequently feature stucco or composite siding, which can crack or crumble if handled by an amateur. Professionals use high-grade anchors suited specifically for these materials to ensure a permanent, tamper-resistant fit. Once the cameras are secure, the focus shifts to cable management. We hide or secure all wiring to prevent both weather damage and intentional tampering. Every entry point into your home is meticulously weather-sealed to protect your property’s integrity from the elements.
The final stage is system configuration. This isn't just about turning the cameras on. We calibrate motion zones to ensure your alerts are meaningful. By filtering out swaying branches or street traffic, we prevent "notification fatigue." We'll also help you configure the mobile app so you have immediate, reliable access to manage your home security camera installation from your smartphone. If you're ready to secure your property with an expert touch, you can book your professional camera setup today.
StaySafe365 Tiered Pricing Transparency
We believe in clarity. Our pricing model is straightforward, so you never have to worry about hidden fees or installation surprises. We offer tiered options to fit the specific needs of your property:
- Single camera installation: $90 for a targeted entry point setup.
- Mid-range protection: 4 cameras for $350, which is ideal for most suburban homes.
- Full perimeter surveillance: 8 cameras for $650 for maximum peace of mind.
The Sacramento Local Advantage
We aren't a distant national chain. Our team has deep expertise in local property layouts, from the modern developments in Natomas to the established neighborhoods of Elk Grove. We understand the specific signal interference issues that can plague densely populated areas. This local knowledge allows us to troubleshoot connectivity problems before they even start. Choosing a local expert means you get direct support without the frustrating wait times often associated with big-box retailers.
The Guardian Handover: Post-Install Setup & Training
The physical mounting of your devices is only the beginning of your journey toward total property oversight. Once the hardware is secure, the "Guardian Handover" phase begins. This is where your home security camera installation transforms from a collection of lenses into an integrated, responsive defense system. We focus on empowering you with the tools and knowledge required to maintain absolute control over your environment, ensuring the technology remains a silent, helpful partner in your daily life.
We start by configuring the mobile app on every family member’s device. Shared oversight is a core component of modern safety; it ensures that a watchful eye is always available, even when you're occupied. During this process, we'll help you customize motion alerts to eliminate "notification fatigue." By fine-tuning sensitivity levels and setting specific detection zones, you'll avoid constant pings triggered by a neighbor’s cat or the afternoon breeze in your Sacramento backyard. You only want to be alerted when a genuine event requires your attention.
Functional testing is the final step in the handover. We'll verify the clarity of the two-way audio and ensure the siren features, if your hardware includes them, are fully responsive. We also review your storage strategy. Whether you prefer the immediate, subscription-free access of local SD cards or the off-site redundancy of cloud-based recording, we'll ensure your data is being logged correctly. This methodical approach guarantees that your high-definition surveillance is ready for action from the moment our technician leaves your property.
Smart Integration Checklist
Modern security thrives on connectivity. Sync your cameras with existing smart hubs like Google Home or Amazon Alexa to create a unified ecosystem. You can establish "Home" and "Away" modes to automate privacy settings and monitoring schedules based on your location. Finally, verify that your live camera feed is accessible via smart displays or TVs. This allows you to check your front porch or side gate with a simple voice command, providing a seamless layer of convenience to your home’s defense.
Maintenance and Longevity
A sophisticated system requires minimal but consistent care to remain effective. Schedule a quarterly lens cleaning to remove dust or spider webs that can degrade high-definition clarity. You should also check for firmware updates monthly. These updates are critical for maintaining system security and accessing new software features. Periodically check your outdoor cable connections for any signs of wear, sun damage, or pest interference to ensure your connection remains uninterrupted. These small proactive steps preserve the reliability of your investment for years to come.
Achieving Total Surveillance Control
Securing your property is a journey that moves from a strategic audit to the final configuration of a responsive defense network. You've learned that a successful home security camera installation relies on more than just mounting hardware; it requires a deep understanding of network connectivity, tactical visibility, and the technical infrastructure that supports your oversight. By prioritizing entry points and ensuring your smart integration is seamless, you transform your house into a proactively monitored environment.
True peace of mind comes when you no longer have to worry about the technical details. Whether you're in Sacramento, Roseville, or Elk Grove, our team provides the expert smart home integration and professional execution your property deserves. We offer transparent, flat-rate pricing starting at just $90, ensuring you get high-end results without hidden fees. Secure your home today with StaySafe365’s professional installation services and enjoy the quiet confidence of a property that's always protected. It's time to take control of your environment with a system that works as hard as you do.
Frequently Asked Questions
How long does a professional home security camera installation take?
A standard home security camera installation typically takes between 2 and 4 hours. The exact duration depends on the number of devices and the complexity of the wiring paths. For instance, mounting four cameras on a Sacramento stucco exterior involves careful anchoring and weather-sealing. A full 8-camera system may require a full day to ensure every angle is calibrated and the mobile app is fully synchronized on your devices.
Do I need to provide my own cameras, or does StaySafe365 supply them?
We focus on providing the professional labor and technical expertise to install cameras you've already selected. This approach gives you the freedom to choose hardware that meets your specific needs while we handle the mounting and smart integration. Whether you have a single camera or a full 8-unit kit, we ensure your equipment is positioned for maximum visibility and long-term reliability.
Can security cameras be installed on any type of siding?
We possess the expertise to mount cameras on virtually any surface, including stucco, vinyl siding, and brick. Each material requires specific high-grade anchors to ensure the hardware remains secure and tamper-resistant. We pay close attention to the structural integrity of your home, meticulously sealing every entry point to prevent moisture damage. This professional touch ensures your surveillance system remains a stable, unobtrusive guardian for your property.
Will my security cameras work during a power outage?
Battery-powered cameras will continue to function during a power outage, but wired PoE systems require a backup power supply. To maintain constant oversight, we recommend connecting your NVR and router to an Uninterruptible Power Supply (UPS). This setup ensures your home security camera installation remains active even when the grid fails. Without backup power, you'll lose both local recording and the ability to access your live feed through the mobile app.
What is the difference between an NVR and cloud storage?
An NVR, or Network Video Recorder, stores your footage locally on a hard drive, providing a subscription-free solution for constant recording. Cloud storage uploads your video to a secure remote server, which allows for off-site redundancy. Many homeowners in Roseville and Elk Grove use a hybrid approach. They enjoy the high-capacity local storage of an NVR while using cloud backups to ensure critical events are never lost due to hardware failure.
Do I need a permit for security camera installation in Sacramento?
Residential security camera setups generally don't require a permit in Sacramento or surrounding areas like Folsom. Your primary responsibility is ensuring your cameras don't intrude on the private spaces of your neighbors. We always suggest reviewing your specific Homeowners Association (HOA) guidelines before the install begins. Local regulations can vary, so a quick check with your neighborhood board provides the peace of mind that your system is fully compliant.
Is there a monthly fee after the professional installation is complete?
There are no monthly fees associated with our professional installation services. You pay a transparent, flat-rate fee based on our tiered pricing, such as $350 for a 4-camera setup or $650 for 8 cameras. Any recurring costs you encounter would be for optional cloud storage plans offered by your camera's manufacturer. Our goal is to provide a high-quality home security camera installation that leaves you in absolute control of your ongoing expenses.
Can I add more cameras to my system later?
You can certainly expand your surveillance network as your security needs grow. Our tiered pricing model allows you to start with essential coverage, like a $90 single-camera install, and add more units later. We'll ensure each new camera integrates seamlessly with your existing smart home hub and mobile application. This scalability ensures your property remains protected even as your layout or family requirements change over time.


